


At this technological revolution level stands the gummy industry. Advances...
Read More


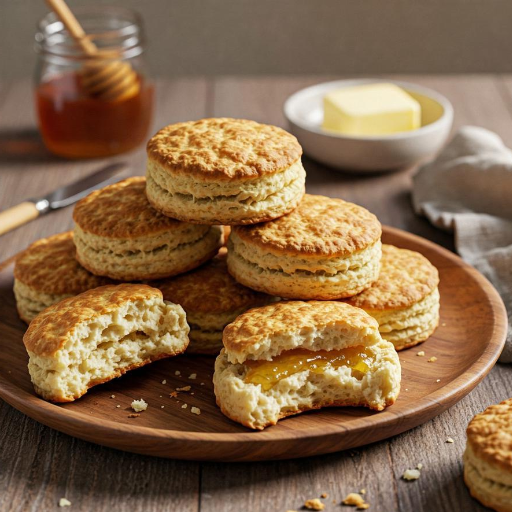
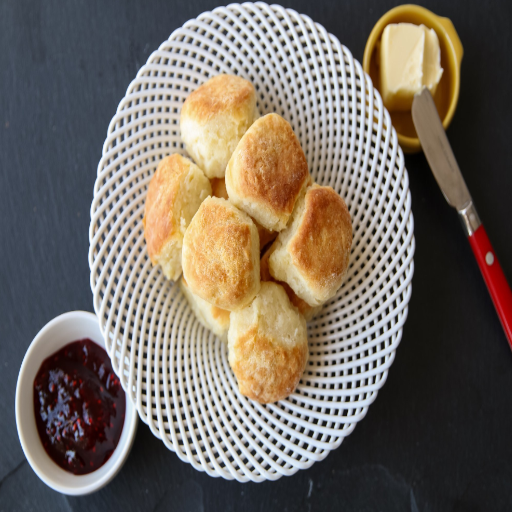
What could be more comforting and homey than the buttery scent of fresh biscuits wafting through the kitchen? Homemade biscuits with flaky layers, a soft bite, and the telltale golden crust are hard to beat for this craving. So what is the secret to such perfection? It all comes down to one versatile ingredient: shortening. This post gives you the lowdown on making Crisco buttermilk biscuits- the idea that they balance flavor and texture perfectly. Thus, whether you’ve been baking all your life or dabbling for the first time, you’ll understand how shortening contributes toward making the best homemade treat. Brace yourself to convert a few simple ingredients into biscuit heaven!
Understanding the Basics of Biscuit Making
The Role of Shortening in Biscuits
Shortening is a specially needed ingredient for making biscuits with tender, crumbly textures. Unlike butter, shortening is all fat with no added water or milk solids. Its pure fat composition works to limit gluten development in dough through the “shortening” of gluten strands- that is precisely how shortening got its name. By limiting gluten formation, shortening will make sure that the final product is soft and delicate, almost melting in your mouth. Shortening also makes a difference for biscuit dough preparation since with higher fat, a dough becomes more cohesive but less sticky; thus, stickier doughs will be more complex to shape into uniform biscuits.
The physical properties of shortening significantly contribute to maximizing the desirable texture uniformity of biscuits. In contrast to butter, which usually melts around 90°F, shortening stays solid at room temperature and during the initial mixing stage (115-120°F). Stability keeps over-incorporation into the dough low and aids even lateral distribution of layers and air pockets during baking, enabling the biscuits to rise evenly with a smooth texture. For technical considerations, shortening-based doughs usually show higher cohesiveness and lower adhesiveness than butter-based doughs, allowing them to be easily handled and shaped.
In biscuit preparations, shortening assures the best looks and the best structure. The biscuits’ tops are smooth and pale with shortening and a bit softer, almost like a cake crumb, compared to flaky ones made using butter. However, the biscuits might want a final touch of brushing with melted butter to form that golden-brown surface at a very short oven-baking time. Be it pursuing breakfast-biscuit-worthy perfection or just old-school Southern baking, shortening continues to stand as one of the most critical settings in biscuit making.
Choosing the Right Flour for Your Biscuit Recipe
Choosing the right flour is critical to making biscuits with just the right texture and flavor. Protein content becomes the primary factor determining gluten formation and thus the type of flour. For a biscuit that is tender and flaky, always go for low-protein flours like all-purpose or cake flour, which usually contain 8-10% protein and inhibit much gluten formation, leaving a softer crumb. On the other hand, bread flour has a higher protein content and more gluten potential; hence, it produces dense biscuits, which is undesirable in this application.
Milling and the flour’s capacity to retain fats and leavening agents can affect the texture and rise of the biscuits. Soft wheat flours, often labeled as “Southern-style flour” in the market, are mill-treated and milled for delicate treats like biscuits. These flours are fine in grain and can combine well with fats like shortening or butter to produce doughs that hold together well. The reduced protein-gluten potential allows them to hold tons of air pockets in the oven, rising lofty and fluffy. For best results, sift your flour before mixing to avoid lumps that impair even leavening.
In addition, flavor gets influenced by the flour choice for your biscuits. Stone-ground flours tend to retain the grain’s natural oils, so they impart a mild nutty overtone into your baked goods. Yet, these might require minor changes to the amount of liquids used since stone-ground flours absorb more than regular flours. In conventional recipes, all-purpose unbleached flour is used because of its versatility. However, mixing flour for texture or taste, such as blending cake flour with a bit of whole wheat flour, could impart slight toughness and flavor. Always measure your flour correctly, preferably by weight so that the remaining ingredients can be measured according to water content.
What Makes a Good Biscuit: Key Ingredients Overview
The oven produces the biscuit, a very fleeting and rather exceptional commodity. So few ingredients work together, yet almost everything they do goes at least in part toward texture, taste, or some lift. Then the flour: It is the backbone of the structure. All-purpose flour is the most commonly used for biscuits in practice, having a protein content of approximately 10%; this provides the proper balance between structure and tenderness. Alternatively, commonly soft wheat flour with protein as low as 8% allows minimum gluten development to form very tender and flaky layers. But if it’s not right by only a half-measure, the dough will either be wet or hard.
The fats impart the appropriate texture due to what they do for their crumbs and layers. Butter, shortening, or a mixture of both may serve the function. In short, the fat is there to coat the flour particles. This simple water gas repels water and thus limits gluten formation, which is responsible for the different texture taxpayers associate with the word tender. Butter gives flavor and forms flaky layers with steam release during baking. In contrast, shortening lacks flavor but provides a consistent texture and is more forgiving of slight missteps in preparation due to its higher melting point, about 115-120°F, compared to butter at 90°F. Some bakers divide the difference by using one-half butter and one-half shortening.
The final components that bring the dough to life are leavening agents and liquids. In most recipes, the leavening agents are baking soda and baking powder, acting together to bring about a shorter rise. Through the action of the other ingredients, the fine gas bubbles develop during baking to make the biscuit light and fluffy. On the other hand, liquids like buttermilk work to hydrate the dough, activate the leavening agents, and lend a faint, musky tang to the flavor of the biscuits. The acid will tenderize the dough as well to make it soft. Keeping everything icy during the entire preparation is best to reap the full benefit from these quality ingredients. The texture and rise will be adversely affected if the fats and leavening agents are prematurely activated. Learn how each of these does its part so that you can begin to make biscuits worthy of being checked all the right boxes.
Types of Biscuits: Exploring Variations
Buttermilk Biscuits: A Southern Classic
Buttermilk biscuits are a Southern designation for any fairly fluffy, tender, soft, and chewy biscuit. These have their origins in the Southern region of the United States. They were created inexpensively to utilize readily available ingredients, including buttermilk, a waste product obtained during butter-making. The popularity of this food soon grew into a well-known regional cuisine generally served with fried chicken, country gravy, or butter with honey. Their attractiveness lies in their rich history and capacity for simplicity and sophistication coexisting perfectly, enabling them to become ordinary fare within home kitchens and classical Southern restaurants.
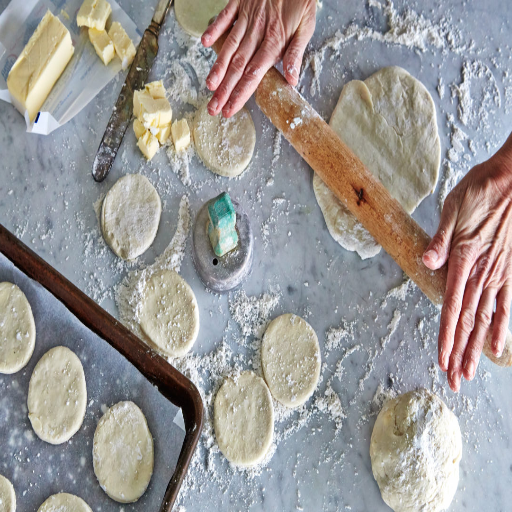
Making buttermilk biscuits is about maintaining cold ingredients and freezing the dough quickly to ensure a tender crumb. In contrast to most common ingredients, buttermilk is somewhat tangy and acidic. Therefore, when the acid reacts with baking soda or powder, it produces carbon dioxide, which creates the rise and height of these light and airy biscuits. When mixing biscuit dough, one must keep butter or shortening cold so that the fats remain in small solid pieces throughout baking, releasing steam to provide flakiness. Following several technical rules such as cutting the butter just smaller than pea-sized chunks, and the hydration rate of the dough should be about 30% will usually offer a delicate balance.
The greatness of buttermilk biscuits lies in their adaptability and usability. They become gorgeous brown because of their limited baking time at high heat, which usually ranges from 425°F to 450°F; yet, inside, they remain soft and pillowy. Traditionally round-and-thick at about two inches in height, home bakers can have lots of fun free-forming the dough: square, slab-cut, or all-out rustic. A butter glaze could be spread over these beauties before baking for extra flavor and shine. From a side dish to a breakfast treat and even as a savory sandwich base, these biscuits speak of love and comfort with every bite.
Baking Powder Biscuits vs. Self-Rising Flour Biscuits
There is the preparation and final result to consider when baking biscuits, with choices for baking powder or self-rising flour. Baking powder biscuits generally form from simple all-purpose flour, baking powder, and salt. Hence, it can be said that there is some choice in whether one would want to vary ratios in their leavening, and one probably has all the ingredients at home. Self-rising flour, however, is a compound of soft wheat flour, baking powder, and added salt, which allows for a more straightforward procedure where the combining and measuring are eliminated. Self-rising flour would thus be great for bakers looking for precision with their flour, while baking powder biscuits give you that freedom to mix and match ingredients.
The preparation methods differ slightly for these two biscuit types, and the differences are quite noticeable during baking. Baking powder biscuits require quick mixing to prevent overworking the flour, thus keeping the crumb tender. Bakers have the luxury of adjusting the amount of salt and trying various additions to complement or contrast with the biscuit flavor, such as herbs, cheese, or even spices. Using self-rising flour sidesteps these issues by pre-blending the ingredients, thus minimizing any room for confusion, especially among beginners. However, one might want to know that the baking powder in self-rising flour loses its potency over time, particularly if the product is stored in non-ideal circumstances, such as areas with high humidity; this could entail uneven leavening when the flour is used later.
The texture and appearance of these final biscuits will be different as well. Baking powder biscuits usually have a more defined flaky layering than self-rising flour biscuits, as they are generally flakier with softer butter or shortening, which self-rising flour biscuits lack. On the other hand, the smoothness of texture and evenness of rise are characteristics of self-rising flour biscuits because the ingredients contributing to the leavening are pre-mixed and well distributed. Both varieties bake at high temperatures (around 425°F) for that beautiful golden brown finish on top and a tender crumb inside. If you enjoy working with baking powder, where you can control every parameter or favor the efficient use of self-rising flour, knowing these differences should put you on the right track toward a perfect biscuit.
Flaky vs. Fluffy: The Texture Debate
Biscuits are often split into two schools of thought, bakers and eaters alike: the flaky biscuits versus the soft biscuits with a fluffy crumb. A flaky biscuit has distinct layers that pull apart easily, providing a crisp exterior and a buttery-sweet flavor. This includes the cold fat, usually butter or shortening, rubbed into the flour, creating pockets of grease that melt during baking and release steam. That steam then separates the layers required for flakiness that so many cherish. Preparing flaky biscuits also entails folding or laminating the dough, where the dough is rolled and folded multiple times to accentuate the layered structure.
Fluffy biscuits, however, aspire to height and a pillow-like texture that melts in one’s mouth. To achieve this texture, the dough is made slightly wetter with minimum handling to avoid the development of gluten, which bucks against the desired softness to create a heavy and dense biscuit. Buttermilk also has its role: its acidity makes the dough tender and activates the leavening agents. The baking method does matter in that fluffy biscuits bake close together to support even rising and trap a little steam for softness.
How you mix it all and choose your working methods will scale your biscuits one way or the other. A higher fat content in very cold fat is essential to the flaky biscuit. For the fluffy biscuits, hydration is more important and wants to hit around thirty-five percent, or thirty, in a delicate balance of liquid to flour. Both are generally baked at a fairly high heat of about 425°F to form a nice crust on top without drying out the middle. The argument between those who enjoy crackling layers and the sinking softness gives both flaky and fluffy biscuits their charm: a recipe with an outcome customized to one’s textural wishes.
Step-by-Step Guide to Making Flaky and Tender Biscuits
Gathering Your Ingredients: What You’ll Need
Selecting the correct ingredients for a recipe can create your final product’s flavor, texture, and structure. Flour is the main ingredient in every biscuit dough, and all-purpose is often called for owing to its gut-protein level, which is usually around ten percent. This amount of protein develops just the needed gluten for some stability without imparting an unwanted amount of toughness. Soft wheat is also called for in Southern-style biscuits, or maybe self-rising flour, which has much less protein and is already prepared with its leavening agent and salt for convenience. Always make exact measurements for your flour (preferably by weight) to keep your results consistent.
The next most significant essential is fat, which contributes to the biscuit being nice and tender while adding flavor. Butter, shortening, or lard—all of these have various qualities. Butter offers a rich butter cream aroma and taste, and creates flaky layers if cut properly into chilled flour. Shortening, which melts at a higher heat, molds to a smooth and homogeneous crumb and forgives mistakes made when used by beginners. Balancing fat and flour is usually key: too much fat or too little flour will result in a greasy biscuit with no crumb, and too little fat or too much flour will result in a dry biscuit with no crumb. Cutting the fat into small pieces, about pea-sized, and keeping it cold all the way through is essential; it helps prevent over-incorporation of fat and allows your biscuits to be light and flaky.
Liquids like buttermilk, vigorous milk, and heavy cream are the last necessary ingredients; they bind everything together while activating the leavening agents to rise. Buttermilk is more popular, as it has acid that softens the dough and imparts a slight tanginess to the flavor. The best results tend to come from using cold liquids that keep the dough’s temperature consistent, preventing premature melting of the fat. Those are the essentials, but feel free to give it your personal touch with additions like shredded cheese, fresh herbs, or a dash of sugar for sweet variations. You’re already halfway to perfect biscuits when you start with the best of everything.
Mixing Techniques for Perfectly Flaky Biscuits
Flaky biscuits are possible when cold fat has been appropriately mixed into flour. Overmixing is the devil, which does not allow small solid lumps of fat to be seen. Start by cutting the cold butter or shortening into the flour mixture using a pastry cutter or your fingers, until it resembles pea-size crumbs. This remains a critical step as these fat solids melt in the oven and evaporate, with the steam then separating layers in the dough. Never incorporate fat that is too soft, and do not work the mixture with warm hands. Otherwise, the fat becomes over-incorporated, and your biscuit texture shall pay the price.
Introduce the liquid into the dough and mix gently until a very loose dough is formed. The trick is simply to hydrate the flour enough and not work its gluten too much, yielding tough biscuits next. With your lightly floured hands, mix the buttermilk or milk into the dry ingredients with very gentle motions. The dough should form into a shaggy, very slightly sticky mass. Avoid serious kneading; generally, 5-6 light touches on a floured surface are sufficient to combine everything without ruining the exquisitely tender texture.
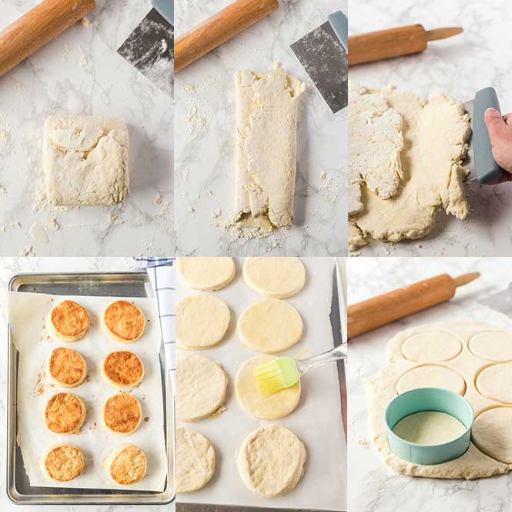
Being alert while shaping and cutting the dough will ensure preservation of the layers of the biscuit. Gently pat the dough to ¾-inch thick and never roll it too thin, which will crush the layers. For round biscuits, press the cutter straight into the dough without twisting; twisting seals the edges and limits the rise. Another option is to use a knife to cut the dough into squares, which prevents excessive reworking of scraps that can make for a tough texture. Hone these mixing and handling processes, and you will never be without biscuits to flaunt with a considered flakiness and melt-in-the-mouth layers.
Baking Tips for the Best Results
The ideal biscuits are made with the right temperature setting on the oven and proper preheating. The ovens should preheat anywhere between 425°F and 450°F, based on the recipe, because that is the best temperature for a good, quick rise and nice, brown crusts. Check the temperature using an oven thermometer; even a little bit of inaccuracy could create a difference in rising or texture of the biscuits. To even bake, place baking sheets into the center rack of an oven, where heat circulates uniformly. Open the oven door less often, preferably not at all, while the biscuits bake; the less heat escapes, the greater the rise of the biscuits inside.
Correct positioning within a tray is key in determining how the biscuits will turn out. For example, if they are to be fluffy, place the biscuits close to each other with edges touching. They will rise vertically and steam each other while baking, conditioning them to a soft texture. For crispier edges, space the biscuits with a little gap so air can circulate around each biscuit. Parchment paper lines the baking tray to keep it from sticking and provide even browning, all without additional fat.
Time is everything when making biscuits, so watch the last few minutes closely to check them. Generally, biscuits take 12 to 15 minutes, depending on the thickness. Check their brown ends and golden tops to know if they are ready. Do not keep them in the oven longer because they will get too dry. Brush melted butter over the biscuits immediately after taking them from the oven for a touch of flavor and shine. It keeps your biscuits moist yet improves their presentation, making them look and taste like a bakery.
Common Mistakes to Avoid When Making Homemade Biscuits
Overworking the Dough: Why It Matters
One of the most common mistakes in biscuit making is the hydraulic overworking, which might dramatically alter the texture and the rise of the final product. The most significant defect is the control of gluten. The proteins in gluten develop in a network, which gives structure when water is added to the flour. A certain amount of gluten development is essential for the required stability. However, the excess kneading and mixing make this network stronger and produce tougher and chewier biscuits than light and tender ones. This rigid structure restricts the dough from expanding sufficiently during baking, reducing rise and ruining the airy texture of biscuits.
Overworking dough even affects the distribution of fats within it. Flaky biscuits require solid fats like butter or shortening to hold distinct pieces within the mixture. These fats melt during baking, producing steam that creates the familiar flaky layers. Overmixing causes the fat to break down too much or entirely into the flour, cutting out the steam-producing mechanism. The perfect biscuit will have dense, pale interiors and lack the light golden streaks created by steam as invisible layers.
Minimizing the handling and gentle handling of things is the way to prevent overworking biscuit dough. The expectant liquid and dry ingredients must be mixed until combined; the dough should look shaggy and a bit uneven, which indicates underdeveloped gluten. Keep it to about five or six very gentle turns on a lightly floured surface when kneading. Also, cold ingredients should be considered, for the lower temperatures of the dough help control the mixing and the fat’s solid structure. So with all these preventive measures against overmixing and treating the dough with utmost care, your biscuits will stay fluffy and flaky.
Using the Wrong Type of Fats for Biscuits
Fat choice can differ between a great biscuit and a biscuit that falls apart when you touch it. The very texture and flavor of the biscuit are determined by that fat, which is butter, shortening, lard, or margarine; they are the most popular forms of fat, but not all of them perform the same in biscuit making. Butter is an 80% fat, 16-18% water, rich flavor like halal-melting point, creates flaky layers; the water in the butter turns into steam and layers up the dough into separate folds during baking, shortening all of which is fat and contains no water so it gives a more tender and more homogeneous crumb with a melting point of 115-120°F. Lard has both properties of flakiness and richness, which Southern-style biscuits have prized over time. Margarine is the one that stands on stiff competition with butter and has different fat contents, and some of them even have low-fat ones that can be added to make biscuits moist and render them too dense.
You will get failures if you use the wrong kind of fat or replace it without regard for the different properties, which may include disappointing results. Poor-quality or too-soft fats, like some margarine or low-fat spreads, do not hold their form during mixing or baking. The biscuits can’t rise and are not flaky because of the lack of structural integrity. Liquid fats such as oils cannot entrap air pockets, so biscuits are dense and lack the melt-in-your-mouth quality. Even using just one kind of fat, for example, butter, could pour in extra water into your dough if you are under-informed about its hydration properties, thus causing a loss of flakiness and unwanted sogginess.
Thus, you should always look for the right fat for your biscuit recipe and consider a blend of fats for flavor and structure. Example: A 50:50 mix of the shortening and the butter may make for a butter-rich taste combination with shortening that maintains an even structure. Make fats as cold as possible before combining them with the flour, since premature melting can disrupt layering within the dough. Choose high-quality fats with the knowledge of their function in preparing biscuits, and with these, you’d always glow with tender, flaky, and tasty biscuits.
Ignoring Oven Temperature: The Science of Baking
Among the many factors affecting biscuit baking, oven temperature seems most often neglected by the seasoned bakers. Biscuits are meant to be baked in a temperature range of 425°F (220°C) to 450°F (232°C) for the desired texture, rise, and browning. This temperature makes it possible for the fat in the dough to melt quickly, producing steam that helps build separate flaky layers with a tender crumb. The gases generated from the quick action of leavening agents like baking powder or baking soda on the batter during high temperatures lead to the rapid rise of the biscuits. A cooler oven delays these chemical reactions and may cause the baking of dense, pale biscuits with uneven texture and a tiny rise.
Poor oven calibration can lead to regrettable results. A lower temperature makes for a slow biscuit burn, creating a dry interior and unappealing golden crust. An overly hot oven does the contrary- it overbakes the surface and leaves the center raw, resulting in a burnt crust and gummy interior. Such rapid cooking under considerable heat also sidesteps those critical processes where steam and rising time come together, creating perfect layers and fluffiness. Hence, monitoring and checking the oven temperature will yield dependable results every time you bake.
To avoid these pitfalls, first and foremost, an oven thermometer should be checked to make sure your oven is accurate, since many home ovens may run 25°F to 50°F hotter or cooler than indicated. Always allow your oven to preheat fully, since this allows for even heating the released air around the biscuits. If your recipe instructs you to set a time according to the temperature, do not continue opening your oven door- draining heat will interfere with the process. These details, plus an understanding of the science behind oven temperature, will carry your pies and biscuits to another level, with a golden consistency, fluffiness, and deliciousness every time.
Serving and Enjoying Your Homemade Biscuits
Creative Ways to Serve Buttermilk Biscuits
Buttermilk biscuits have transcended the realm of being mere Southern comfort and are now open to the complete creativity of an innovative chef in flavor combinations. One of those innovative serving ideas involves, for example, making a savory slider with buttermilk biscuits as the base. The warm biscuit is split in half and layered with some pulled pork or crispy fried chicken; vegetarians even have an option with roasted veggies and herbed cream cheese. Elevate the finish further with colorful toppings such as pickled onions or fresh herbs and thread them with some decorative picks for the polish. It would do exceptionally well for bite-sized passes, perfect for a party or gathering- think smaller buttermilk biscuits.
Transform into dessert shortcakes, drenching the buttermilk biscuits in their finest glory. Slice them in half and fill their bellies with various macerated fruits: strawberry, peach, blueberry. Then top the whole thing with a large whipped cream or mascarpone dollop. Honey drizzles down the mouth, maybe a snowing of powdered sugar, and wow, spellbinding. Add an extra visual and crunch from the top of the biscuit by sprinkling it with turbinado sugar before popping it in the oven, producing a luscious golden crackle contrasting the softness within.
You could also use them for a brunch spread or breakfast bowls: poached eggs, maybe smoked salmon, or avocado slices on top of them create a lovely option for breakfast. Alternatively, crumble them over meaty casseroles, or let them sit in delicious gravies, curries, or sauces to make another bold fusion interpretation of the dish with flavors. For a rustic yet modern take, keep them on a wooden board with spreads, jams, and condiments to impress all your friends with a biscuit bar. Buttermilk biscuits can shine in any meal, sweet or savory.
Pairing Biscuits with Toppings and Spreads
I’ll confess that biscuits have always been a slight obsession with me. They aren’t just a side dish to me; they’re a canvas, an open palette where I can let my creative juices run free, especially in garnishing and spreading, etc. I just love to eat biscuits in savory ways. I break open a newly baked biscuit, soft-scramble an egg, layer it with smoked salmon, and sprinkle some fresh dill. The buttery, flaky biscuit goes down well with the richness of the egg and salmon. And when I want some good old comfort, nothing works better than a biscuit with some good ol’ sausage gravy. The warm, peppery gravy seeps down the biscuit’s fluffy layers to form a truly filling, hearty bite.
Sweets, meanwhile, can use biscuits as a lovely canvas to smear all manner of creams and question-colonial-theorizing spreads, jams being especially ideal. Homemade berry jams or preserves are a must for me, particularly when they’re slightly tart to counterbalance the buttery richness of the biscuit. Sometimes I mix it with clotted cream or mascarpone and a drizzle of honey. One of my all-time favorites is warm fig jam and a smear of goat cheese on a biscuit. The juxtaposition of sweet jam with tangy cheese does the magic. I reach for Nutella or some chocolate hazelnut spread if I’m craving something decadent. Um, biscuits and chocolate? Yes, please.
One of the things I have learned through the years is how biscuits are also partners with surprises. I’ll smear jalapeño jelly on a biscuit for a punchy heat and then top it with a piece of cheddar. A smear of garlic-herb butter or sun-dried tomato pesto might be another nice option with a Mediterranean flair. During my creative cooking expeditions, I have even been known to slap whatever leftover sauce I have in the kitchen, like chimichurri or romesco, on a biscuit or two. It’s about layering enchanting textures and flavors to create a beautiful combination.
Whenever I was with relatives or friends, I set up a toppings and spreads station for biscuits. There would be a selection of jams, honey, specialty butters, and some savory spreads, allowing everyone to create their combinations. It turns the meal into an interactive opportunity for everyone to find their favorite combinations. Sweet or savory, simple or fancy, there’s no wrong way to enjoy a biscuit. For me, the fun is experimenting with flavors and finding combinations that feel a tad decadent with every bite.
Storing Leftover Biscuits for Maximum Freshness
A truly mouthwatering batch of biscuits will hardly last half an hour. Most are gobbled up while still warm and freshly baked from the oven. Leftovers are inevitable, and I have learned a thing or two over the years on keeping those extra biscuits tasting just as good the next day. The first rule in short-term storage is to allow biscuits to cool completely before putting them anywhere. Storing them while warm only leads to condensation, which makes them damp and soggy. Once cooled completely, I usually store them in some airtight container or a resealable plastic bag at room temperature, keeping them soft and fluffy for two days.
If I don’t think I can polish the biscuits off in two days, then the best option for me would be freezing them. For this, I just wrap each biscuit in plastic wrap and store it in a freezer-safe bag to maintain texture and flavor. This extra step protects from freezer burn and helps keep moisture in each biscuit. To reheat frozen biscuits, I take them out earlier, allowing them to thaw for about thirty minutes at room temperature and popping them into a preheated oven at 350°F for 5-10 minutes. This way, the biscuit scenario of drying them out or making them brittle doesn’t arise, since they regain that freshly-baked quality.
Another trick I have learned is how to reheat leftover biscuits without sacrificing taste. Wrapping room temperature biscuits in aluminum foil before putting them in the oven to be reheated also keeps moisture in and keeps them soft all along. One or two biscuits are remembered best with that technique, whereby I place them on a microwave-safe plate, cover them with a damp paper towel, and zap for 15 to 20 seconds. It remains tender and warm without turning rubbery, thanks to the steam generated within that covering.
Sometimes, I prepare biscuit dough in advance for long-term storage, skip freezing cooked biscuits, and freeze unbaked ones instead. I roll it out and cut the shapes I want; then I freeze the raw ones on a sheet until solid. I put them all in a bag and have small batches ready when I want them. This way, I get to bake my biscuits fresh every time. It doesn’t matter whether you freeze them after baking or before; maximum freshness comes down to keeping air out and moisture away. These methods have kept many leftover biscuits to become delicious, delightful treats even days or weeks later.
Reference Sources
- Flaky Old Fashioned Biscuits – A fool-proof recipe guide discussing shortening and other fats in biscuits.
- Biscuits with Shortening Recipe – A detailed recipe for making fluffy biscuits with shortening.
- Fats and Liquids in Biscuits – An in-depth blog post from King Arthur Baking discussing the role of shortening and other fats in biscuit texture and flavor.
Frequently Asked Questions (FAQs)
How to Make Biscuits Using Shortening?
Making biscuits with shortening is easy, yielding taste-filled, crusty biscuits. First, collect your dry ingredients, AP flour, baking powder, sugar, and salt, and then, using a pastry cutter, drop in your shortening until it looks like coarse crumbs, or do it by hand by cutting the shortening into the flour. Add milk to form a somewhat sticky dough. Then move your dough onto a floured board; do not knead too much. Grab some biscuit cutters, cut out your biscuits, and put them on the baking sheet with parchment paper before baking.
What Are the Ingredients for a Lush Biscuit?
You would want all-purpose flour, baking powder, and salt with cold shortening or cold butter for fluffy biscuits. It is all about that perfect blend of dry ingredients and cold fat to create that light-and-melting-in-the-mouth sensation. When you create flaky layers, you should always have your shortening be cold. With the dry ingredients, buttermilk or milk may be substituted for moisture. Extra lift can come from baking soda and even more so when an acidic compound is in use, such as buttermilk. Then, a little sugar is put in–which is an excellent idea if you want to bring out the flavors of your lush biscuits.
Can Biscuits Contain Baking Soda?
Yes- biscuit recipes use baking soda as a leavening agent, especially with acidic ingredients. Baking soda assists in the rise and fluffing up of biscuits. To exploit the gas-producing action of baking soda, there has to be an acid that reacts with the soda base in the mixture: for instance, buttermilk or yogurt. Furthermore, a one-to-one mix with baking powder can give the fluffiest results. Other dry ingredients should be modified to ensure the dough remains malleable yet firm on the work surface.
How Can I Successfully Freeze Unbaked Biscuits?
Freezing unbaked biscuits enables you to bake them a little to have fresh biscuits anytime you want them. After cutting out your biscuits, place them onto a baking sheet and freeze them until solid. Once frozen, move them to resealable plastic bags or an airtight container while labeling their date. When you wish to bake them, you can cook them directly from the freezer by extending the baking time by a good number of minutes. The result is that your biscuits’ texture and flavor remain intact for that day when you feel like feasting on homemade biscuits.
What Is the Best Way to Incorporate Shortening in Making Biscuits?
Shortening renders the necessary fluffiness and tenderness needed in biscuits. The shortening must be very cold to utilize shortening in biscuit making with approval. Essentially, one will cut into the shortening using a food processor like a pastry cutter or fork until the natural shortening gives the mixture a coarse crumb texture. This means the fat will have had a portion incorporated into the flour without having the dough over-kneaded. Other people prefer Crisco because it is consistently successful when baking. It can be fun to experiment with different ratios of butter and shortening for fresh and yummy results.
How to Make Drop Biscuits with Shortening?
Drop biscuits are generally easier and require no rolling or cutting from traditional biscuit recipes. Start the drop biscuits with shortening by gathering the dry ingredients, all-purpose flour, baking powder, and salt individually. Use a knife to cut shortening into flour in another bowl until crumbs are formed. Add the milk to this mixture to create a slightly sticky dough. Drop large spoonfuls of dough onto a parchment-covered baking sheet with a spoon now. These biscuits, which are very light and fluffy, are best when buttered with a pat or served with gravy.
Is It Possible to Use a Biscuit Cutter to Make Biscuits?
A biscuit cutter is one of the things you need for this kind of activity. There are many other recipes where a biscuit cutter is used. Biscuit cutters, or a similar method, are a good way to hold even shapes and promote even heat distribution throughout the baking process. In some cases, when the dough is rolled onto a floured surface, pressing the cutter gently into the dough but without any twisting helps biscuits to rise beautifully. If you have no biscuit cutter, a glass will work just as fine. The idea is to handle the dough with as little manipulation as possible to maintain the flaky texture of the biscuit. Once done, biscuits are arranged on a baking sheet, and thus simplicity is brought to the kitchen.
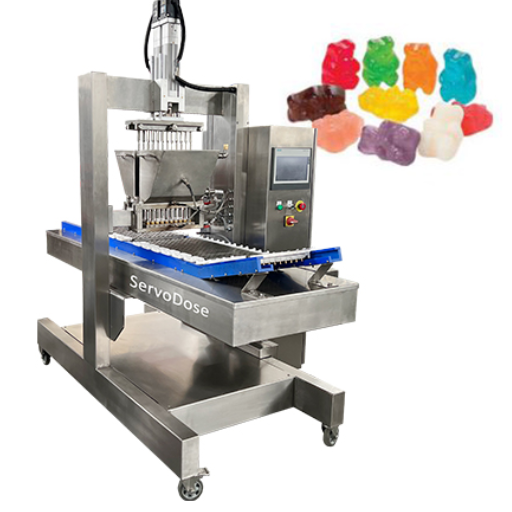

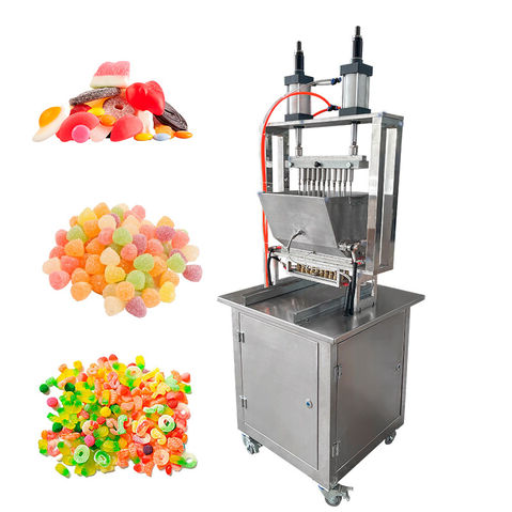

Shanghai Fude Machinery
Shanghai Fude Machinery Manufacturing Co., Ltd is a leading manufacturer of top-notch gummy and cookie making machines with more than 15 years’ experience in the industry. We provide creative equipment that ensures accuracy and speed while sharing intelligence with food producers. Shanghai Fude remains to be one of the most reliable companies for food machinery because of its dedication to perfection.