


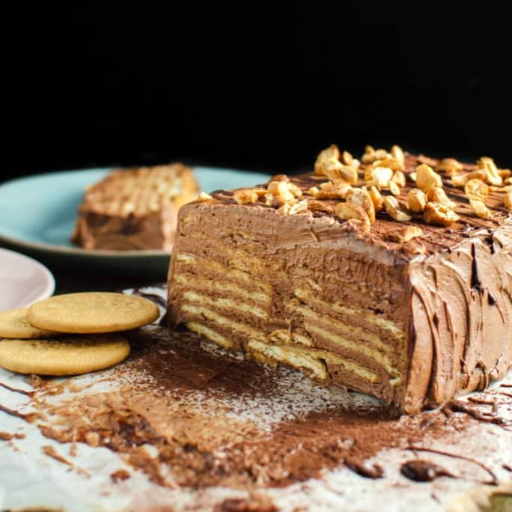
The combination of rich chocolate and crispy biscuits creates a...
Read More


Buttermilk drop biscuits are among those recipes that scream classic simplicity and comfort, the flaky wonders that find their way into almost every hearty breakfast and warm dinner. The best part is that one doesn’t need to be a professional baker to get soft, golden, and well-flavored biscuits. This article shares an easy, sure-fire recipe that will turn out delicious every time. Whether you’re a lifelong cook or a kitchen virgin, the article teaches you all the tricks to mastering the quintessential comfort food and tips for tweaking the biscuits for just about any setting. Prepare yourself to elevate your baking while keeping it simple!
What are buttermilk drop biscuits?
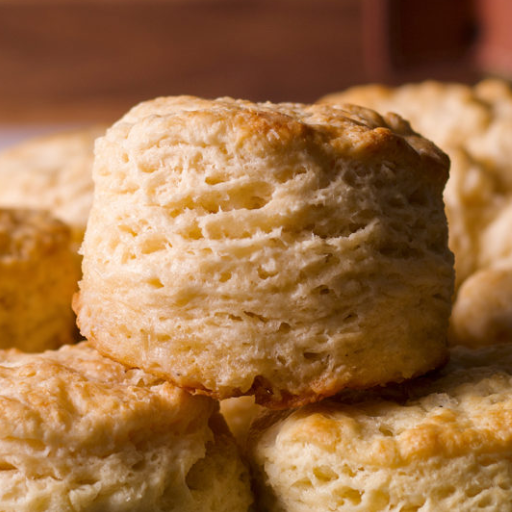
Understanding the texture of the biscuits
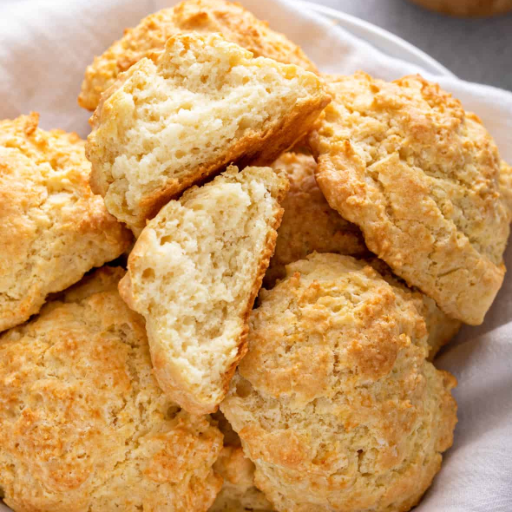
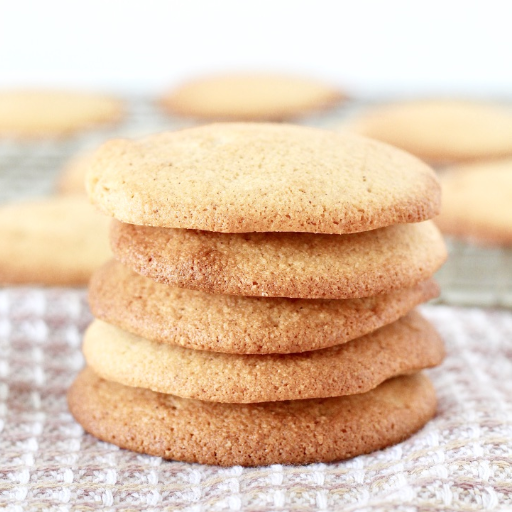
One of their textures most impactful and enjoyable properties is found in buttermilk drop biscuits. These are known to have light and airy interiors with firm, golden-brown crusts on the outer side. Sometimes the crumb feels tender and soft and does not stay put in the mouth, oozing through until every bite. The unusual texture arises from some key factors—the acidity of the buttermilk and the cold butter worked into the dough to create layers that puff out nicely while baking and making sure the weight of wet ingredients well balances that of dry ingredients is also a crucial consideration toward achieving that perfect fluffy yet slightly dense balance.
Less handling also helps keep the texture intact. Too much mixing or kneading, and you wind up with a tough biscuit, as gluten development counteracts the biscuit’s natural tender texture. The dough-gentle-fold-together-until-just-combined approach keeps the batter lumpy but holds it together just enough to provide a soft crumb. The drop-style method offers a quick and easy alternative to rolling and cutting traditional biscuits. It maintains their rustic appeal without compromising that light, fluffy texture through heavy shaping or manipulation.
Temperature factors into the baking nightmare to an extreme degree. Cold butter ensures the fats stay put until steam is created, making the biscuits rise and forming the flaky layers. With the right temperature, they also meet in the middle of perfect browning from the outside, leaving them soft on the inside. Putting all of these together makes a texture that has charmed the world forever.
Why use buttermilk in biscuits?
In any biscuit-making process, buttermilk is the soul that brings the magic of texture, flavor, and structure into the biscuit. It has a touch of tang, or sourness, that adds an overall distinctive taste, and a whisper of richness that balances with the butter flavors of the dough. This acidity reacts with baking soda or sometimes baking powder and releases carbon dioxide bubbles; the liberation of these gas bubbles gives the biscuits that gentle, airy lift and soft top. Left unchecked, this reaction would give the biscuits an excellent rise, making them light, fluffy, and tenderly melting on the tongue.
Buttermilk needs to have that consistency. A little thick and almost creamy, buttermilk is handy to partially bind the dry ingredients, just enough to allow for soft, pliable layers. Compared to regular milk, buttermilk marries taste and utility. It can also go ahead and weaken the gluten in the flour, as its acids would prevent the dough from getting too tough or overworked. This tenderness thus becomes the magic ingredient that gets you to that crackling golden edge and into that wonderfully soft, delicate interior that will be an everlasting memory for the lucky few who bite into these classic biscuits.
Difference between drop biscuits and rolled biscuits
The main difference between drop biscuits and rolled biscuits comes with method and texture, as one caters to the varying preferences and whites of occasions. Drop biscuits are made with a wetter dough requiring no kneading or rolling; instead, the dough is scooped and “dropped” onto a baking sheet. This also makes it quick to prepare and less laborious to handle. The texture is more rugged and crumbly, with irregular shapes emphasizing the rustic look.
On the contrary, rolled biscuits are prepared with a stiffer dough that is lightly kneaded and rolled out and then cut into uniform shapes by a biscuit cutter or any other appropriate utensil. The folding and rolling of the dough traps air, allowing for the flaky texture of these layered biscuits. Because they are cut with deliberateness, the presentation of these biscuits is usually more polished and pleasing to the eye.
Nutritionally speaking, rolled biscuits might require a little bit more butter or margarine to ensure their tender and flaky texture, while drop biscuits tend to use less fat due to their higher moisture content. Both processes have their advantages, with drop biscuits being best for the kitchen rushed through and rolled biscuits being best for a laid-out meal on the pulling table. The choice of which one to prepare refers to how much time you have and the type of presentation you wish to display.
How to make drop biscuits?
Essential dry ingredients for fluffy biscuits
Light, fluffy biscuits come about using the perfect array of dry ingredients. All-purpose flour is the foremost ingredient for making flaky layers, which builds the framework that holds the biscuit together. One ought to select only the best-quality brands, with variable protein content (around 9-11%); this highly favors the proper tenderness and workable structure in a biscuit. An alternative to cutting down the protein content and increasing biscuit tenderness is to substitute all-purpose flour with cake flour partially.
The leavening agents in the mix are baking powder and baking soda, which give the biscuits their rise with their commonly airy texture. Ensure the baking powder is less than six months old to be active. If the biscuits are supposed to include acidic ingredients like buttermilk, add baking soda to enhance the leavening further. Use a tablespoon of baking powder per cup of flour, adjusting according to the recipe’s instructions and dryness.
Salt is another vital ingredient because it adds flavor to biscuits. Minimal salt can be substituted with many other flavor enhancers, but none of those will marry together the dry ingredients closely enough to form a biscuit. Acceptable sea salt or table salt works well for dry ingredient mixtures to give even mixing. This perfect amalgamation of dry ingredients makes a sturdy yet thin crust for those airy, fluffy, soft biscuits. Always sift or whisk the dry ingredients together to distribute the mixture evenly and aerate it, contributing very much to light and airy results.
The role of cold buttermilk and melted butter
Cold buttermilk and melted butter are key ingredients for producing the perfect biscuit, each playing a role in texture and flavor. The cool buttermilk reacts with the leavener- baking soda or baking powder- to produce carbon dioxide bubbles, which causes the biscuits to rise. It is best to keep the buttermilk cold in the mix to slow down the melting of the butter, thus allowing the formation of tiny pockets of fat that help with flakiness.
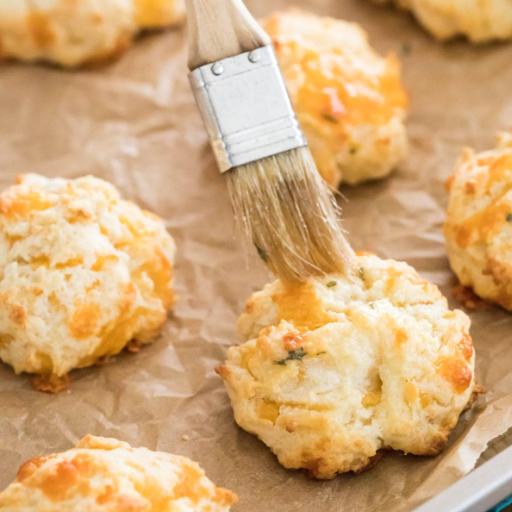
Melted butter might be brushed over the biscuits before they go in the oven or after they’re baked, to keep the flavor robust and form an attractive crust. The flavor balance between tangy buttermilk and butter is an acid-cream dance that works well together to lift the entire profile of eating enjoyment. An excellent flavor and texture combination will come with high-quality butter and buttermilk, cared for well along the way to preparation so that the butter is kept cold during mixing and melted just before application.
Steps to make the biscuits from scratch
Prepare Your Ingredients: Put every ingredient on your table, and start with the preparation. For Hausfrau biscuits, you need all-purpose flour, baking powder, baking soda, cold unsalted butter, buttermilk, a pinch of salt, and some sugar to balance it. Using fresh, good-quality buttermilk with cold butter ensures a tender biscuit.
Combine the Dry Ingredients: In a large mixing bowl, add flour, baking powder, baking soda, salt, and sugar. Whisk the entire mixture thoroughly so that the leavening is evenly distributed. This is essential for the biscuits’ light and airy nature.
Cutting In the Butter: Cut the butter into small pieces. Mix these with a pastry cutter or your fingers into the flour mixture until it resembles coarse crumbs. The little chunks of butter will melt during baking, producing flaky layers.
Adding the Buttermilk: Add the buttermilk little by little, stirring very gently to just barely mix it in. Do not over-mix the dough, as it will yield heavy biscuits. The dough will feel slightly sticky yet manageable.
Shape the Dough: Place the dough onto a floured counter. Pat or roll very gently until about ¾ inch thick. To encourage flaky layers, fold the dough in half two to three more times before the final rolling out for cutting.
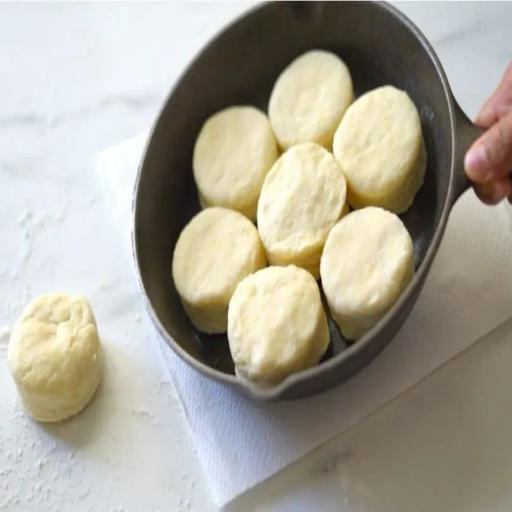
Cut Out the Biscuits: Cut the biscuits using a round biscuit cutter or a glass. Avoid twisting the cutter so that the biscuits can rise straight.
Prepare for Baking: Lay the biscuits on a parchment-lined baking sheet. For soft-sided biscuits, keep biscuits fairly close together. For crispier edges, space them apart. Brush the tops with melted butter or egg wash.
Bake Until Done: Preheat the oven to 425°F (218 °C), and bake for about 12 to 15 minutes, or until the tops are golden brown. Do take care not to overbake.
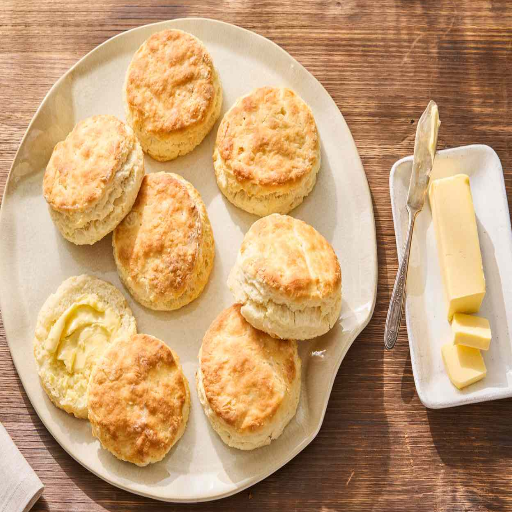
Serve Warm: Right after taking the biscuits out of the oven, brush them again with melted butter. Serve warm with jam, honey, or gravy on the side for a satisfying treat.
Following these steps mindfully will produce homemade biscuits that are tender, flaky, bursting with flavor, and perfect for any occasion.
What makes buttermilk drop biscuits so special?
Secrets to achieving flaky drop biscuits
Drop biscuits can be beautifully flaky when a few select techniques are followed and good-quality ingredients are used. The trick begins with having everything, right from the butter to the buttermilk, as cold as possible. The cold butter tends to create steam pockets, which produce those airy layers when placed in the hot oven. The dough must be given just enough mixing; anything more will result in a tough biscuit. Mixing just until everything combines helps preserve the biscuits’ soft texture.
Besides that, acidity is essential; hence, the use of buttermilk brings out flavor and helps leavening. Together, baking powder, baking soda, and acidic buttermilk create a light and fluffy crumb. To ensure consistent flakiness, the dough should be folded a few times in layers before it is dropped onto the baking sheet, akin to the lamination process but without the roll-out step, which increases texture.
Now bake your biscuits at a high temperature of about 425 degrees Fahrenheit or 220 degrees Celsius, fast to attain a good rise and browning. Use a preheated baking stone or heavy-duty sheet if workable to spread the heat evenly so that the biscuit gets a crisp exterior in its crust and a soft interior. Your biscuits will be flaky and ridiculously good if you follow these tips.
How can you ensure the tops are golden brown?
For your biscuits to achieve perfect golden brown tops, there should be a bit of strategy, with some during preparation and baking. One of the popular methods involves brushing the tops of the biscuits with milk, cream, or an egg wash just before sending them into the oven. Milk and cream give the biscuits a light shine, whereas an egg wash- a mixture of egg and a tablespoon of water- is a brush-on color with a thick, glossy finish. In my opinion, these things also add flavor.
Temperature and time keep the heat in the biscuit, browning it. Usually, use the temperature suggested in your recipe, around 425°F (220°C), for preheating to get consistent brown coloring. If options are available in your oven, go with a convection setting, which helps by circulating the air to get an even color on biscuit tops. Placing biscuits on the middle rack keeps the maximum distance from the heat so as not to over- or under-brown them.
At the very end, you should watch closely during the last few minutes. Turn the sheet halfway through if that will help, until all biscuits are evenly browned. The very detail makes for the sight of biscuits with beautifully golden tops becoming edible with enticing looks.
Why are these biscuits best served fresh?
There is no better time for fresh biscuits than just out of the oven. When warm, perfectly balanced in texture, crisp on the outside, and light and flaky on the inside, they are heaven. The butter in the layers is still partially melted, imparting wonderful flavors that create an exquisite feeling of fabulous tenderness. As time passes, these precious qualities of biscuits get lost; very often, the biscuits start drying out and get thick because of exposure to air or poor storage. When served fresh, every mouthful offers a proper texture, tastes right, and comforts you with the warmth of fresh baking.
When served fresh, these biscuits are at their maximum afrolution. The second coming out of the oven, the great tempered aroma of toasted butter, flour, and a sweet crunch drifts in the air, enticing everyone nearby. This enticing fragrance starts fading away as the biscuits cool down, reducing the value of the sensory experience. So fresh biscuits are a treat to behold, smell, and eat with their charm, creating an aura and excitement to make the ambience even greater for any meal or occasion they are served with.
Lastly, these biscuits are best enjoyed fresh with other accouterments. Warm, soft, just-baked biscuits make an excellent foundation for butter, honey, and jam, and pair awesomely well with savory dishes. If served later, their texture and moistness might vary considerably and interfere with how they mix with a spread or dish. Prioritizing unless-must-serve-later-for-something sort of makes this a super high-class Yay!-worthy experience that’s the spotlight for these biscuits!
Can I make homemade biscuits without buttermilk?
Using a buttermilk substitute
If your kitchen is dry of buttermilk, don’t despair! There are more straightforward ways to substitute it and yield similar results for that homemade biscuit recipe. One of the most popular solutions is to mix milk and an acid. For every cup of buttermilk indicated in the recipe, use one tablespoon of white vinegar or lemon juice combined with milk to make a complete cup of liquid. Set aside 5–10 minutes to allow it to curdle and develop that typical tang of buttermilk. It remains a good substitute for that traditional biscuit flavor and tender texture.
Another popular alternative is to use plain yogurt or sour cream. Both have acids that rise with the recipe and help develop the moist and fluffy texture. Whatever you use, thin it with a little milk or water until it achieves a similar consistency to buttermilk. This is particularly good for bakers who desire a little richness in their biscuits.
A plant-based version of milk, such as almond or soy milk, vinegar, or lemon juice, is another good substitution for those who are trying to keep their recipe vegan. This acid activation reaction allows baking soda or powder in the recipe to work correctly as a leavener, giving the biscuits a good rise. With all these alternatives, your delicious biscuits will be soft and perfectly golden, even without traditional buttermilk.
The impact of substitutions on buttermilk biscuits
When using a buttermilk substitute in biscuit recipes, it is essential to consider how it may affect the biscuit’s texture, flavor, and baking performance. Regular buttermilk imparts tangy flavors and acidic conditions to activate a leavening agent such as baking soda, providing the typical rise and fluffy texture to biscuits.
Alternative substitutes like plant-based milk and acid (lemon juice, for instance) can cause acidity to rise. Still, they might have a somewhat different taste, a little less tang than the traditional one. Similarly, dairy-based alternatives like yogurt or sour cream may produce richer biscuits. However, their thicker consistency might disturb the balance between wet and dry ingredients.
Research shows that, whichever substitute one chooses, it is essential to ensure proper moistness and acidity in soft biscuits with tender crumbs. Adjusting the ratios of measurements and depending on the flavors of choice will be necessary when substituting.
How do we maintain the texture of the biscuits?
The texture of good biscuits requires careful measuring and technique. First, keep the fat, whether butter or shortening, as cold as possible before mixing. This creates air pockets as the fat melts during baking, thereby creating a flaky and tender texture. Do not over-mix the dough; overworking the gluten leads to denser and tougher biscuits. Gradually incorporating all the liquids is crucial for obtaining the right consistency; too much liquid leads to sticky dough that’s hard to handle, while too little yields dry biscuits.
Bake the biscuits in a preheated oven at the recommended temperature; this last step does count in giving an even rise to the biscuits and also to the even browning of the same. Texture would be influenced by the weight of the flour, the kind of leavening agent, and maybe even the humidity of the environment. Because of this, some bakers prefer weighing their ingredients with a digital scale rather than using traditional volume measurements. Once these variables are kept constant, any baker can make soft biscuits with airy crumbs every time!
How to store your homemade biscuits?
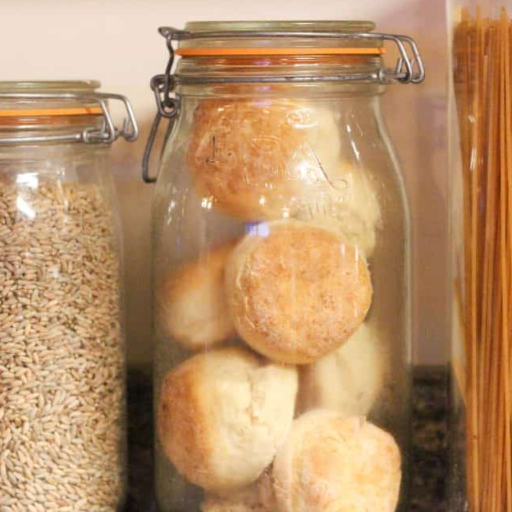
Keeping biscuits in an airtight container
An airtight container is needed to maintain the crispiness of biscuits. After biscuits are allowed to cool down completely, I put them in an airtight container to retain their soft or crisp texture from any possible invasion of humidity or air. Correct storage methods also help preserve biscuit flavors for longer.
I sometimes freeze the biscuits to keep them for a longer time. Putting them in a freezer-safe plastic bag or fully sealed container is necessary to prevent any form of freezer burn. When ready to eat, heat the biscuits in the oven for a few minutes to warm them and restore the needed texture. This way, I ensure that my homemade biscuits stay tasty, whether I eat them immediately or much later.
Can you freeze buttermilk drop biscuits?
Yes, buttermilk drop biscuits can be frozen; I often use this technique to keep the biscuits fresh. Once baked and completely cooled, the biscuits are placed in a single layer on a baking sheet and frozen for approximately an hour. This step is crucial as it prevents the biscuits from sticking together. The biscuits are then transferred to a freezer bag or an airtight container, and as much air as possible is removed to prevent freezer burn. Properly stored, the biscuits keep for up to three months.
When it is time to eat, I simply reheat the biscuits directly from their frozen state. I preheat the oven to 350°F (175°C), place the biscuits on a baking sheet, and bake for 10 to 15 minutes until warmed and their texture restored. I sometimes use the microwave for a faster approach, but nothing beats using the oven for product flavour and consistency. Thus, freezing makes it possible to enjoy fresh, homemade biscuits even on a hectic day!
Reheating tips for fluffy biscuits
In my opinion, the best way to reheat fluffy biscuits is to do so in the oven to retain their texture and flavor. Set your oven to 350°F (175°C), loosely wrap the biscuits in aluminum foil to prevent drying, and heat for about 10 minutes. This reheating keeps the outside soft with a slight crispness while the finish remains warm and fluffy, as if it had just been baked.
If forced for time, a quick microwave stint works as well. To prevent the biscuit from drying out, place it on a microwave-safe plate and cover it with a damp paper towel. Heat the biscuit in 15- to 20-second intervals until just warm. This is the quickest approach, but not the best for the ideal biscuit texture.
Sometimes I split the biscuit, melt a bit of butter in a pan, and toast the cut sides just enough to crisp them up slightly. It makes the edges ever so slightly crisp, raising the experience while maintaining that softness inside. Either way, I never go without a way to eat some fluffy, yummy biscuits after they have been stored away.
Reference Sources
-
Easy Flaky Buttermilk Drop Biscuits – Mel’s Kitchen Cafe: A detailed recipe for making flaky and delicious drop biscuits.
-
Buttermilk Drop Biscuits—Two Peas & Their Pod: This quick and easy recipe for tender, flaky biscuits.
-
Buttermilk Drop Biscuits – Boston Girl Bakes: A guide to making homemade biscuits without rolling or kneading.
-
5 Ingredient Easy Drop Biscuits—Baker Bettie: This simple recipe requires only five ingredients and less than 30 minutes to prepare.
-
Drop Biscuits Recipe – NYT Cooking: A classic recipe from The New York Times Cooking section.
Frequently Asked Questions (FAQs)
1. Is my buttermilk OK to be substituted in the recipe?
Yes, if buttermilk is not available at home, simply mix one cup of brand milk with a tablespoon of lemon juice or white vinegar and allow it to stand for approximately five minutes before using it. Other possible alternatives are a little diluted plain yogurt and sour cream.
2. How do I keep my biscuits from being dense?
For some good buttermilk drop biscuits, keep the dough light and airy by never overworking it. Stir it just until combined; overworking the dough can actually develop too much gluten, which causes the biscuits to be denser. Also, the rise will be greatest if you use fresh baking powder or baking soda.
3. How do I store leftover biscuits?
Leftover biscuits can be stored in an airtight container at room temperature for two days after they cool. For longer storage, wrap them tightly with aluminum foil and place them in a freezer-safe bag. Then, they can be frozen for up to three months. Keep the ovens or skillets going while reheating.
4. Can any flavor or mix-ins be added to the biscuits?
Certainly! Buttermilk drop biscuits can be a fun little blank canvas for several additives, such as shredded cheese, herbs (think: rosemary or chives), garlic powder, or even a little sugar for sweetness. The best way to do this is to gently fold ingredients into the dough just before baking.
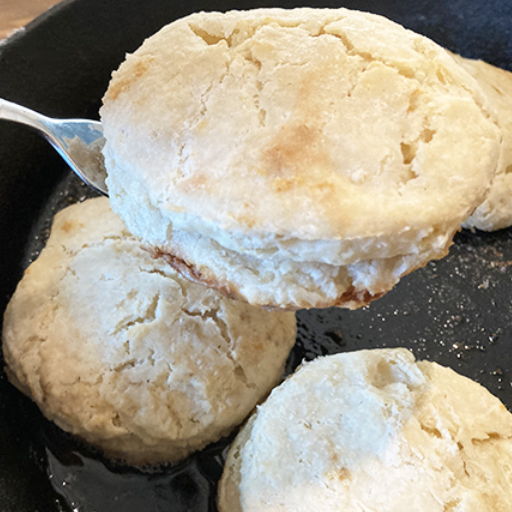
5. How can you get crisp edges?
Making the biscuit edges sublime while the centers remain soft is all about that high initial heat, basted with butter. Start baking at 425°F (218°C) and brush the tops with melted butter before entering the oven. For the skillet, bake them right in the preheated, greased cast-iron pan.
6. Can the biscuits be made gluten-free?
Gluten-free buttermilk drop biscuits are an option using all-purpose flour alternatives that are a 1-to-1 substitute for baking. The main thing to check is that the blend contains xanthan gum for a good texture. Slight adjustments in moisture may be needed, depending on the brand.
7. Why are my biscuits so lopsided or just spreading all over?
If they are all gobby and spreading, you could be using butter that is too soft or even melted. But keep your butter cold- it should be cut in quickly with the flour, and the little bits should still be visible, about the size of small peas, which will help create flaky layers in the finished biscuits. Also, don’t over-flatten the dough before scooping or dropping it on the sheet.


Shanghai Fude Machinery
Shanghai Fude Machinery Manufacturing Co., Ltd is a leading manufacturer of top-notch gummy and cookie making machines with more than 15 years’ experience in the industry. We provide creative equipment that ensures accuracy and speed while sharing intelligence with food producers. Shanghai Fude remains to be one of the most reliable companies for food machinery because of its dedication to perfection.